Upgrading to Disc Brakes on the Rear of a Jeep Cherokee XJ
The Jeep Cherokee XJ, produced from 1984 to 2001, remains an icon of off-road capability and utilitarian simplicity. However, one of its most persistent weak points is the rear drum brake system. While adequate for factory specifications, drum brakes fade quickly during heavy off-road descents, mud intrusion reduces stopping power, and maintenance—from spring kits to wheel cylinder replacements—is notoriously finicky. Upgrading to rear disc brakes transforms the XJ’s braking performance, providing consistent pedal feel, shorter stopping distances, and easier serviceability. Fortunately, this is a well-documented swap using parts from a variety of Jeep and Mopar donors, most commonly from a ZJ Grand Cherokee (1993–1998) with a rear disc option, or a Ford Explorer 8.8 axle, which is another popular XJ swap.
The primary advantages of rear discs are immediate and practical. Disc brakes self-clean better, shedding mud, snow, and debris with each rotation—critical for XJs that see trail duty. They dissipate heat rapidly, virtually eliminating the brake fade that plagues drums during long mountain descents. The swap also replaces the troublesome drum parking brake mechanism with a simpler, more reliable caliper-actuated parking brake (though some setups use a small internal drum brake inside the rotor hat). Overall, the XJ stops with more authority and balance, reducing nose dive and improving control under heavy braking, especially with larger-than-stock tires.
From a parts perspective, the ZJ disc swap is the most straightforward. You’ll need ZJ backing plates, calipers, rotors, parking brake cables, and a proportioning valve adjustment—or better yet, a ZJ combination valve to correct front-to-rear bias. The job requires removing the axle shafts to slide off the old drum backing plates, then bolting on the disc assemblies. Many XJ owners also install a new master cylinder from a WJ Grand Cherokee or a 2004–2006 TJ Unlimited (LJ) for increased fluid volume and improved pedal modulation. The total cost, even with new components, is often under $500, making it one of the most effective safety and performance upgrades for the Cherokee.

While addressing stopping power, an often-overlooked companion upgrade is the Jeep Cherokee xj headlights system. The stock XJ sealed-beam headlights—typically halogen units from the 1990s—are dangerously dim by modern standards. Upgrading to LED or high-output H4 housings with a relay harness transforms nighttime trail visibility. Many XJ owners install harnesses that draw power directly from the battery, bypassing the undersized factory wiring that causes voltage drop. Paired with housings like the Hella H4 or Truck-Lite LEDs, the low beam casts a wide, sharp cutoff, while high beams illuminate deer, trail obstacles, and unmarked turns hundreds of feet ahead. Considering the XJ’s short hood and upright windshield, better headlights also reduce eye strain and increase reaction time—vital when descending a dark trail after a rear disc upgrade has already improved brake control. Together, the rear disc swap and modern headlights address two of the Cherokee’s greatest compromises: stopping where you need to, and seeing where you’re going.
Installation of the rear disc brakes is manageable for a home mechanic with basic hand tools and a torque wrench. Be prepared to fabricate or modify the parking brake cable brackets—a common friction point—and bleed the entire system thoroughly. After the swap, expect a firmer, higher pedal and noticeably less fade during repeated hard stops. For XJ owners who tow small trailers, drive mountainous terrain, or simply want modern safety, rear discs are not a luxury but a necessity. And when paired with a quality headlight upgrade, your classic Cherokee will not only stop like a modern SUV but also see the road ahead with confidence, keeping the spirit of the XJ alive for another quarter-million miles.
Upgrading Your 2004 GMC Sierra 1500 Converting Halogen Tail Lights to LED
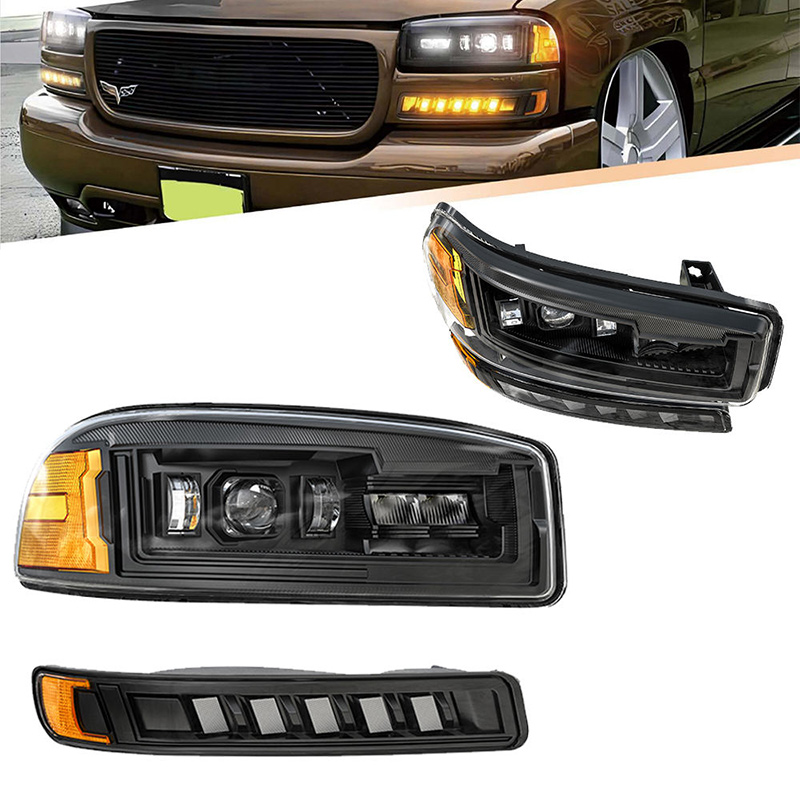
For owners of the 2004 GMC Sierra 1500, upgrading from the factory halogen tail lights to modern LED assemblies represents one of the most impactful visual and safety improvements you can make. The third-generation Sierra, produced from 1999 to 2007, came equipped with traditional halogen bulb systems that, while functional, lack the instant response time, brightness, and contemporary appearance of today's LED technology . This conversion has become increasingly popular among truck enthusiasts looking to modernize their vehicle while enhancing nighttime visibility and safety.
Why Make the Switch?
LED tail lights offer several compelling advantages over the original halogen units. The most significant benefit is safety: LEDs illuminate nearly instantaneously when you apply the brakes, giving drivers behind you precious extra milliseconds of reaction time compared to the gradual warm-up of halogen bulbs . Additionally, the 2004 GMC Sierra led headlights produce a brighter, more intense light that remains highly visible in adverse weather conditions such as heavy rain, fog, or snow. They also consume less power and typically last many times longer than traditional bulbs, making them a worthwhile long-term investment.
Beyond functionality, the aesthetic transformation is substantial. LED tail lights give the 2004 Sierra a clean, modern appearance that bridges the gap between the truck's classic body style and contemporary lighting design. Available in various finishes including chrome housing, black housing, and smoked or clear lens options, LED assemblies allow owners to customize their truck's rear-end appearance to match their personal taste .
Selecting the Right LED Tail Light Assembly
Several reputable manufacturers produce direct-fit LED tail light assemblies for the 2004-2006 GMC Sierra 1500. Spyder Auto and SPEC-D Lighting (also known as JY Lighting) are among the most recognized brands in the aftermarket, offering DOT-compliant assemblies that meet Federal Motor Vehicle Safety Standards . KS (Anzo USA) and Sonar are also well-regarded manufacturers with over three decades of lighting experience, producing assemblies that undergo rigorous testing for durability, moisture resistance, and vibration tolerance .
When shopping, verify that the product listing specifically states fitment for 2004 GMC Sierra 1500 with fleetside bed configuration, as stepside models may use different assemblies . Most quality LED tail lights are sold as complete pairs and come with built-in resistors to prevent the "hyper-flash" issue—rapid turn signal blinking—that commonly occurs when replacing halogen bulbs with lower-wattage LEDs .
Installation Overview
Converting to LED tail lights on a 2004 Sierra is a straightforward process that typically requires only basic hand tools and about 30-45 minutes of time. Most assemblies are designed as direct plug-and-play replacements that use the factory wiring harness and mounting locations .
Tools Needed: A 10mm socket or wrench, a ratchet, and painter's tape for paint protection .
Basic Steps:
Disconnect the battery – This is crucial for GM vehicles of this era, as their electrical systems can be sensitive, and failure to disconnect may blow fuses .
Apply painter's tape around the tail light edges to protect the truck's paint during removal.
Lower the tailgate and remove the two 10mm bolts securing the tail light assembly .
Pull the assembly firmly to release it from its mounting tabs, then unplug the wiring harness.
Transfer any necessary components—some LED assemblies require reusing the factory reverse light bulb, while others come with complete LED systems .
Connect the new LED assembly to the factory harness, mount the resistor box (if external) using double-sided tape in a location away from heat and moisture, and bolt the new light in place .
Reconnect the battery and test all functions: parking lights, brake lights, turn signals, and reverse lights.
Important Considerations
Before purchasing, confirm that the LED tail lights are DOT and SAE compliant to ensure they are street legal in your area . Some local regulations may restrict smoked or tinted lenses, so check your state's requirements if opting for darker finishes .
During the first few days of use, it is normal to see minor condensation inside the lenses as residual moisture from manufacturing evaporates. This should clear within a few days of normal operation. For added protection against moisture intrusion, some owners apply clear silicone sealant along the seam where the lens meets the housing .
Converting the tail lights on a 2004 GMC Sierra 1500 from halogen to LED is a worthwhile upgrade that delivers improved safety, modern styling, and long-term reliability. With numerous reputable brands offering direct-fit, DOT-compliant assemblies and a straightforward installation process that most DIYers can complete in under an hour, this modification offers exceptional value. Whether you are looking to enhance your truck's appearance, improve nighttime visibility, or simply replace faded or damaged original equipment, an LED tail light conversion is a practical and satisfying upgrade for your Sierra.
Best Disc Brake Upgrades for a 1965 Mustang
The 1965 Ford Mustang is an American icon, cherished for its timeless styling and spirited performance. However, one aspect of these classic ponies that leaves much to be desired is the braking system. Factory-equipped with four-wheel drum brakes, a '65 Mustang requires significantly more pedal effort and stopping distance than modern drivers are accustomed to. Upgrading to a disc brake system is arguably the most important safety modification you can make, transforming your classic's ability to stop with confidence and predictability. This guide explores the best disc brake upgrade options available, helping you choose the right system for your driving style, budget, and wheel preferences.
Understanding Your Upgrade Options
The market offers several pathways to disc brake conversion, ranging from budget-friendly DIY solutions to comprehensive, bolt-on kits from reputable manufacturers. One of the most popular and highly recommended options is the factory-style reproduction kits from specialists like CSRP (Classic Super Reproductions Parts) or Chockostang. These kits replicate the original Kelsey-Hayes four-piston caliper setup used on 1965-67 GT350s and are designed to be a direct bolt-on for V8 cars with five-lug spindles . Forum users consistently praise these kits for their straightforward installation, period-correct appearance, and excellent stopping power, especially in manual configuration . For those with six-cylinder cars retaining four-lug wheels, kits like the CJ Classics power disc conversion provide a bolt-on solution using single-piston calipers and 10.5-inch rotors, though they require careful attention to shock tower clearance .
For enthusiasts seeking modern high-performance engineering, branded kits from Wilwood or SSBC (Stainless Steel Brakes) represent the premium end of the spectrum. Wilwood's Classic Series Dynalite kit, for example, features lightweight forged aluminum four-piston calipers and 11.30-inch rotors, offering superior clamping force and heat dissipation while clearing most 14-inch wheels . SSBC is another trusted name, offering complete front and rear conversion packages that maintain compatibility with original-style wheels . Experts strongly advise sticking with established brands, as some lesser-known "mom-and-pop" conversions may have fitment or engineering flaws .
Important Considerations for Your Conversion
Before purchasing a kit, several critical factors demand your attention. First, consider your wheel size. Many disc brake kits are designed to fit under 14-inch wheels, but this is not universal. Wilwood specifies that their kit clears most 14-inch disc brake wheels but will not fit OEM drum brake wheels . The LEED Brakes kit also requires a minimum 14-inch wheel diameter . If you plan to run original-style steel wheels or aftermarket 14-inch rims, verify kit compatibility. Second, decide between manual and power brakes. While power brakes reduce pedal effort, many experienced owners argue that manual disc brakes on a lightweight Mustang stop just fine and offer better pedal feel . Power boosters can also complicate installation, requiring firewall clearance and potentially interfering with other components like modern five-speed transmissions . Mustang Steve's engineering offers a well-regarded 9-inch booster conversion that addresses many of these clearance issues .
A Parallel Upgrade: Illuminating the Road Ahead with Modern Headlights
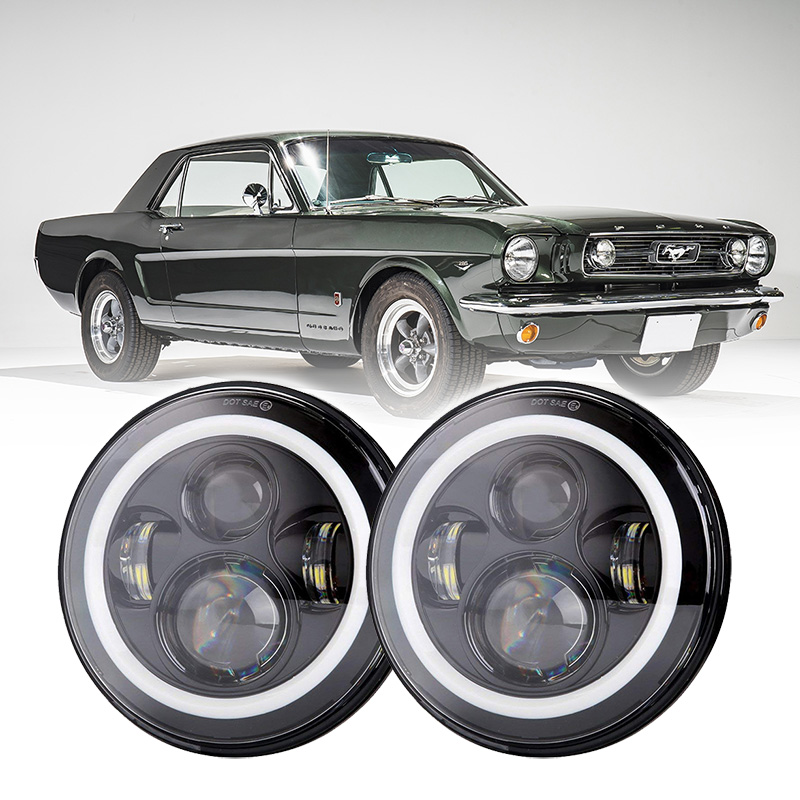
While you're enhancing your Mustang's safety with a modern braking system, it's the perfect time to consider another critical safety upgrade: the headlights. The original sealed-beam halogens, charming as they may be, provide inadequate illumination by today's standards, especially after decades of service. Upgrading to a modern Ford Mustang LED headlight system is a straightforward project that yields dramatic improvements in nighttime visibility and safety . Direct-fit 7-inch round LED headlights are available for 1965-1973 Mustangs, offering plug-and-play installation that requires only basic hand tools and about 30 minutes of your time . These units feature bright, crisp white light with both low and high beam functions, and many include stylish halo daytime running lights that give your classic a distinctive modern flair while significantly improving your ability to see—and be seen—after dark . Pairing a disc brake upgrade with LED headlights creates a comprehensively safer classic that you can confidently drive in any condition.
In conclusion, upgrading your 1965 Mustang's brakes and lighting are two of the most rewarding investments you can make. Whether you opt for a factory-style reproduction kit from CSRP, a high-performance Wilwood setup, or a complete SSBC conversion, you'll transform your pony car's driving dynamics. When combined with a simple LED headlight upgrade, your Mustang will not only stop with modern confidence but will also illuminate the road ahead with clarity and style, ensuring many more years of enjoyable, safe cruising.
Essential Maintenance Guide for the 2006 GMC Sierra 1500
The 2006 GMC Sierra 1500 stands as a testament to rugged, dependable American engineering. To ensure this modern classic continues to deliver reliable service for another 100,000 miles, a proactive and disciplined maintenance regimen is non-negotiable. This guide moves beyond the basic owner's manual, focusing on the critical, time-sensitive services and known vulnerabilities of this platform. By addressing these key areas, you protect your investment, prevent costly failures, and maintain the truck's capability and safety.
Fluids and Filters: The Lifeline of Your Truck
Treat your Sierra's fluids as its lifeblood, changing them before they reach their absolute degradation point. For the ubiquitous 5.3L Vortec V8, clean oil is paramount. Use a high-quality full-synthetic or synthetic blend and adhere to a strict 5,000-mile change interval. This is especially crucial for engines with Active Fuel Management (AFM), as clean oil helps prevent lifter failure. The transmission fluid in the 4L60-E is a known weak point under stress. A fluid and filter change every 60,000 miles is cheap insurance against shuddering shifts and premature wear. Annually flush the brake fluid, as it is hygroscopic and absorbs moisture that leads to internal corrosion and a spongy pedal. Don't forget the coolant; use only Dex-Cool and perform a complete flush every 100,000 miles to prevent intake gasket issues and heater core failure. Finally, the transfer case and differentials require regular attention; change their fluid with high-quality synthetic gear oil every 50,000 miles to ensure your 4WD is ready when needed.
Suspension, Steering, and Brakes: The Safety Triad
The Sierra's front end is robust but wears predictably. Annually inspect ball joints, tie rod ends, and idler arms for play. Worn ball joints are a critical safety hazard that can lead to catastrophic failure. Listen for clunks from worn sway bar end links and bushings, which degrade handling. The power steering system is a common leak point; check the lines and reservoir regularly and consider a fluid flush if the fluid is dark. The braking system demands vigilance. These trucks are hard on front rotors—inspect for warping or deep scoring. Ensure the caliper slide pins are lubricated annually to prevent uneven pad wear and brake drag, a common issue that leads to premature rotor replacement.
Electrical and Illumination: Reliability and Vision
The electrical system's arch-nemesis is corrosion. Annually, clean the battery terminals and major ground connections, especially the engine-to-chassis strap, to prevent a host of gremlins. Test your alternator output under load to ensure it's keeping up with demand. A critical yet often overlooked upgrade that merges maintenance with safety is the headlight system. The factory halogen housings become severely clouded, drastically reducing output. A proper refresh involves two steps: first, restore or replace the lenses using a professional kit or new housings. Second, and most impactful, install a headlight relay harness. This inexpensive kit bypasses the truck's aging, thin factory wiring, delivering full battery voltage directly to the bulbs. This simple mod can increase brightness by over 30%, restoring safe nighttime visibility and is a foundational upgrade before considering LED GMC Sierra 1500 headlights or HID bulbs.
Proactive Monitoring: Catching Problems Early
Develop a keen sense for your truck's normal operation. Listen for the tell-tale "piston slap" on cold starts (common but worth monitoring), the whine of a failing power steering pump, or the groan of a weak fuel pump. Keep an eye on oil consumption, a known trait of higher-mileage Vortec engines. Monitor for coolant loss that could indicate a failing water pump, radiator, or intake manifold gasket. Regularly check for exhaust leaks at the manifold, which can break studs and cause inefficient operation.
By embracing this comprehensive, proactive approach, you shift from reactive repairs to strategic preservation. This guide ensures your 2006 Sierra 1500 remains not just a nostalgic vehicle, but a dependable, safe, and capable tool, fully prepared for the demands of work, adventure, and daily life for years to come.
Essential Maintenance Checklist for Your 2004-2008 Ford F-150
The 2004-2008 generation of the Ford F-150, known for its bold styling and rugged capability, remains a beloved fixture on American roads. Its reputation for durability, however, is deeply intertwined with a commitment to consistent, proactive maintenance. These trucks are workhorses, but they have known quirks that, if neglected, can lead to costly repairs. This essential checklist is not merely about preserving function; it’s about safeguarding your investment, ensuring reliability, and extending the life of a modern classic. By methodically addressing these key areas, you can keep your F-150 running strong for years and hundreds of thousands of miles to come.

Fluids: The Absolute Lifeline
The single most critical maintenance category for this generation is its fluids. Treat them with reverence and change them before the manufacturer’s extreme intervals. Engine Oil: For the ubiquitous 5.4L 3V Triton V8, clean oil is its best defense. Use a high-quality full-synthetic or blend and change it every 5,000 miles without fail. This helps prevent the notorious timing chain guide wear and phaser tick caused by sludge and oil starvation. Transmission Fluid: The 4R75E automatic is robust but benefits greatly from regular service. A fluid and filter change every 60,000 miles is cheap insurance against harsh shifts and premature wear. Coolant: Use only Motorcraft Gold or a certified equivalent. Flush and replace it every 100,000 miles to prevent electrolysis and internal corrosion, which can lead to heater core and intake manifold gasket failures. Differential & Transfer Case: These are often "lifetime" fluids only in theory. Changing them every 50,000-75,000 miles with the correct specification fluid ensures your 4WD system is ready when needed.
The Vital Spark: Plugs, Coils, and Filters
The 5.4L 3V engine’s spark plug design is its most infamous characteristic. The two-piece plugs can seize and break in the cylinder head if left in too long. Replace spark plugs religiously every 40,000-50,000 miles. Use a high-quality, single-piece design plug for the update and follow the precise, careful procedure (with engine cold) or hire a professional. Simultaneously, inspect and replace any failing COP (Coil-On-Plug) ignition coils that cause misfires. Keep the air filter clean and replace the fuel filter every 30,000 miles to maintain performance and economy.
Suspension, Steering, and Brakes: Safety and Stability
This heavy truck wears out its front end components. Annually check for play in the ball joints, tie rod ends, and wheel bearings. Worn ball joints are a critical safety hazard. Listen for creaks or clunks from the sway bar end links and bushings. The power steering system is another known weak point; inspect the lines for leaks and flush the fluid if it appears dark. The brake system requires vigilance. These trucks are hard on front rotors—inspect for warping or deep grooves. Ensure the caliper slide pins are lubricated annually to prevent uneven pad wear and brake drag.
Illumination and Electrical Integrity: The Headlighting System
Compromised vision compromises safety. The factory 2007 Ford F150 headlights system on these models suffers from two primary issues: severely clouded polycarbonate lenses and underwhelming halogen output. Simply installing brighter bulbs into hazy lenses creates dangerous, scattered glare. Proper maintenance is a two-step process. First, restore or replace the headlight housings. Use a professional-grade lens restoration kit to remove oxidation, followed by a UV sealant, or install new OEM-style housings. Second, address the weak factory wiring. Installing a simple headlight relay harness is a transformative upgrade. This harness bypasses the truck's long, thin factory wires, delivering full battery voltage directly to the bulbs. The result is significantly brighter, more reliable illumination from your existing bulbs, which is crucial for safe nighttime driving. Also, check that all other exterior lights—especially critical third brake lights prone to seal failure—are fully functional.
Proactive Monitoring: Beyond the Checklist
Develop a keen ear and eye for your truck. Listen for the "death rattle" of a failing timing chain tensioner or the whine of a weak power steering pump. Monitor for coolant loss, which could indicate a failing thermostat housing or a leak from the degas bottle. Check for oil leaks from the rear main seal or valve covers. Keep the battery terminals clean and tight.
Adhering to this disciplined, proactive maintenance regimen transforms your 2004-2008 F-150 from a potential liability into a dependable partner. It empowers you to address known flaws before they strand you, ensuring this capable generation of America's best-selling truck continues to earn its sterling reputation one well-maintained mile at a time.
The Best Off-Road Lighting Kits for Your Chevy Tahoe Z71
Your Chevy Tahoe Z71 is a monument to capability, built with an off-road-tuned suspension, skid plates, and all-terrain tires. But when the sun sets on the trail, its factory lighting often hits its limit, leaving you navigating by a narrow cone of light that fails to illuminate the ditches, obstacles, and turns ahead. Upgrading to a dedicated off-road lighting kit is not a mere accessory; it’s an essential performance mod that transforms your night-driving experience from tense to confident. The right kit floods the periphery with daylight-bright illumination, turning night into day and ensuring you see every rock, rut, and ridge long before you reach it. From LED light bars to specialized pods, the market offers solutions for every need, budget, and desired look for your full-size adventure rig.

The first and most popular upgrade is the LED Light Bar. Mounted typically on the roof, behind the grille, or on a robust front bumper, a high-quality light bar is the workhorse of off-road illumination. For the Tahoe Z71’s broad front end, a 40-inch to 50-inch curved or straight dual-row bar offers the perfect blend of width and intensity. Top-tier brands like Baja Designs, Rigid Industries, and KC Hilites lead the pack. The Baja Designs OnX6+ series, for instance, combines extreme output with a patented “Combined Reflection Technology” lens that provides both a long-distance “spot” and wide “flood” pattern in a single bar, eliminating the need for multiple light types. Rigid’s Radiance series offers excellent output with a distinctive signature look. For mounting, a low-profile roof rack bracket or a grille insert mount keeps the installation clean and aerodynamic, while a heavy-duty aftermarket bumper provides the ultimate sturdy and integrated platform.
Beyond the primary light bar, auxiliary pod lights are crucial for filling specific lighting gaps. A pair of amber or white fog/driving combo pods mounted low on the bumper or behind the grille cut through dust, snow, and fog while illuminating the immediate foreground and ditches. For extreme long-distance vision, dedicated spot beam pods can be added to a bumper or a-pillar mounts to reach down the trail hundreds of yards. The KC Hilites Gravity Pro6 LED pods are legendary for their raw power and durable construction. For a-pillar mounts, low-profile brackets that bolt into existing windshield hinge locations offer a sturdy solution without permanent damage. This multi-light strategy—a broad light bar, ditch-light pods, and spot beams—creates a comprehensive “light canopy” that leaves no shadow on the trail.
Integration and installation separate a professional setup from a problematic one. A critical but often overlooked component is the headlighting system. Your factory Chevy Tahoe headlights and high beams are the foundation of your lighting strategy. Before adding auxiliary lights, many owners first upgrade their stock halogen projectors with high-performance LED or HID bulb kits or, even better, complete LED projector headlight assemblies. This ensures your baseline road lighting is vastly improved. When wiring your new off-road kit, never tap directly into factory headlight wires. Every quality kit includes a harness with relays and fuses. The power should be drawn directly from the battery, with the relay trigger wire connected via a switch to a fused ignition source. A professionally designed switch panel, like those from sPOD or Switch-Pros, is the ultimate upgrade. These systems provide clean, centralized control with microprocessor management, protecting your Tahoe’s electrical system and allowing you to easily operate multiple light zones from a dashboard-mounted module.
When selecting your kit, prioritize lumens and beam pattern over wattage. Look for IP68 or IP69K waterproof ratings and durable, cast aluminum housings. Remember, amber lenses are superior for particle-filled air (snow, dust, fog) as they reduce glare. Finally, always be a responsible off-roader: use your blinding off-road lights only on remote trails, and dim them immediately for other adventurers. With the right kit—such as a Baja auto Designs 40” light bar paired with their Squadron Sport combo pods on a-bracket mounts, all controlled by a sleek sPOD switch—you’ll unlock the true 24/7 capability of your Chevy Tahoe Z71, illuminating the path to adventure, no matter how dark the night.
Common Problems and Reliable Fixes for the 2000 Chevy Silverado 1500
The 2000 Chevy Silverado 1500 remains one of the most popular early-generation GM pickup trucks thanks to its durability, strong Vortec engines, and simple mechanical design. However, like any 20-plus-year-old vehicle, it comes with several known issues that owners frequently encounter including the headlights. So people have to upgrade with the DOT 2000 Chevy Silverado led headlights from online store. Understanding these common problems—and applying proven fixes—can significantly extend the life and reliability of the truck. This guide covers the most frequent trouble areas and how to deal with them effectively.

1. Fuel Pump Failure
One of the most common and frustrating issues on the 2000 Silverado 1500 is fuel pump failure. Symptoms include hard starting, random stalling, long crank times, or a complete no-start condition. The original fuel pumps in these trucks often fail due to age, heat, and contamination inside the tank.
Reliable Fix
-
Replace the pump with a high-quality OEM or AC Delco unit—not a cheap aftermarket pump.
-
Clean or replace the fuel filter to avoid clogging the new pump.
-
Inspect the fuel pump wiring harness; melted connectors are common and require replacement.
2. Intake Manifold Gasket Leaks
The Vortec 4.8L, 5.3L, and 6.0L engines are known for intake manifold gasket problems. A failing gasket can cause rough idling, coolant loss, misfires, or engine overheating.
Reliable Fix
-
Replace the intake manifold gasket with an upgraded aluminum-reinforced or Fel-Pro MS98000T gasket.
-
Flush and refill the cooling system to remove contaminants.
-
Perform a torque-spec-correct installation to prevent future leaks.
3. Transmission Hard Shifting or Slipping
The 4L60E transmission used in the 2000 Silverado is reliable but prone to wearing out over time, especially under towing or heavy loads. Issues include delayed shifting, slipping in third or fourth gear, and harsh engagement.
Reliable Fix
-
Replace the transmission fluid and filter if it hasn’t been serviced.
-
Install a heavy-duty shift kit to improve pressure control.
-
If gears are slipping, a rebuild or replacement is often required.
-
Add an auxiliary transmission cooler for long-term durability.
4. ABS Module and Brake Sensor Problems
Many owners report ABS lights coming on due to front wheel-speed sensor corrosion. When this happens, ABS may activate at low speeds, making the truck unsafe.
Reliable Fix
-
Clean or replace the wheel-speed sensors.
-
Use dielectric grease to protect against moisture.
-
If the ABS module fails, consider sending it to a specialist for rebuilding, which is more affordable than replacing the entire unit.
5. Faulty Instrument Cluster Gauges
Common gauge failures include erratic speedometer readings, jumping fuel gauges, or dead stepper motors.
Reliable Fix
-
Replace the gauge cluster stepper motors (X25.168 type).
-
Many repair services can rebuild the entire cluster and update backlighting for better visibility.
6. Lighting System Wear and Failures
After two decades, lighting issues are common across the truck. Headlights may dim, tail lights may flicker, and dash lights may fail due to worn wiring, old bulbs, or weak grounds.
Reliable Fix
-
Replace old halogen bulbs with modern LED bulbs for stronger output and reliability.
-
Clean all grounds, especially the frame ground and front lighting ground near the radiator support.
-
Inspect and replace corroded bulb sockets.
-
Upgrading to a dedicated headlight relay harness greatly improves brightness and reduces voltage drop.
-
Replace cracked or cloudy headlight housings to restore visibility.
A well-maintained lighting system dramatically improves nighttime safety and helps reduce electrical strain.
7. Front Suspension Wear
Upper ball joints, lower control arms, and tie-rod ends often wear out on high-mileage Silverados, causing clunking sounds, uneven tire wear, or wandering steering.
Reliable Fix
-
Replace worn ball joints with Moog or OEM components.
-
Inspect and align the truck after every suspension repair.
-
Upgrading shocks improves ride comfort and front-end stability.
8. Rust on Rocker Panels and Cab Corners
The 2000 Silverado car is notorious for rust on the lower body sections, especially in cold or humid climates. Rocker panels, door sills, and cab corners are often the first areas to deteriorate.
Reliable Fix
-
Sand, treat, and seal any early rust spots before they spread.
-
Replace severely rusted rocker panels with weld-in or slip-on replacements.
-
Apply undercoating and rust-prevention spray to protect the truck long-term.
2000 Silverado
Despite these common problems, the 2000 Chevy Silverado 1500 remains a dependable truck when properly maintained. Most of its issues are well-documented and easy to fix with the right parts and preventive care. By focusing on key areas—fuel delivery, intake gaskets, transmission health, lighting, suspension, and rust—you can keep this classic Silverado performing reliably for years to come.
